Brush Change and Adjustment
Replace the Brush Cassettes
Comments
The warranty of the brush shaft is valid only when the original
brush cassettes are used.
- Start the engine.
- Open the engine cover.
- Turn the brush to get good access on both sides. Use the control unit with the brush in manual mode or use the directional valves manually.
- Press and hold the button (1) for brush change procedure.
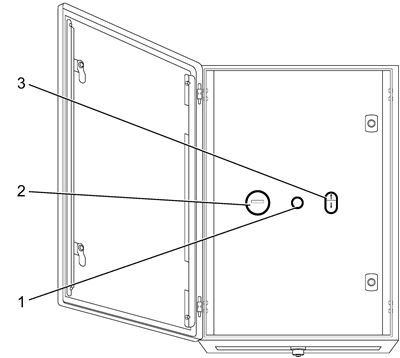
- Push button, brush change
- Hour counter
- Raise/lower brush switch
Figure 1: Rear control panel
- Release the button when the brush is in the top end position.
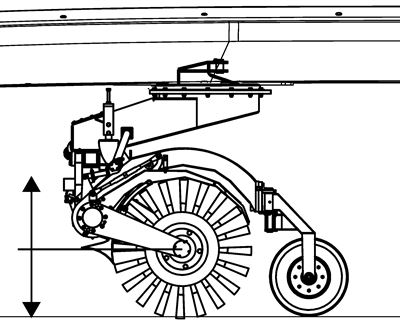
Figure 2: Brush height
- Stop the engine.
- Remove the screws holding the brush carrier plate on the left side of the brush.
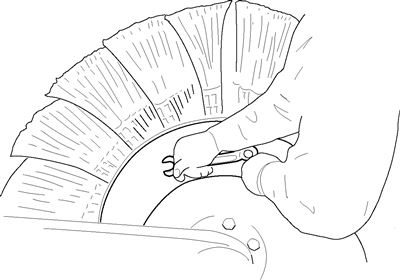
Figure 3: Remove the brush carrier plate

Figure 4: Allow the brush carrier to hang from the shaft.
- Remove the brush cassettes. If any brush cassettes are stuck use a wooden broomstick to push out the cassettes.
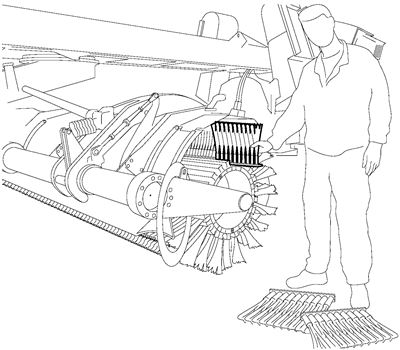
Figure 5: Remove the brush cassettes
- Wash the shaft with water and a high-pressure washer. Rotate slowly, or alternatively tip the shaft to one side so that the water can run out.
- Check the aluminium profiles. These must not be so damaged that they make it difficult to replace the brush cassettes.
- Check that the plastic guides are not damaged or worn.
- Tighten the screws in the brush shaft during the first brush replacement.
Tightening torque 50 Nm.
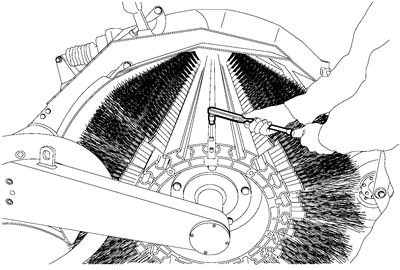
Figure 6: Tighten the screws
- Install new brush cassettes. If the brush cassettes do not enter the slots smoothly, lubricate with silicone.
NOTE!
The brush carriers and the slots for the brush cassettes must not be lubricated with grease. Lubrication must only be performed with silicone-based lubricants.
- Install the brush carrier ring in position and tighten the screws to 50 Nm.
- Start the engine.
- Start the automatic brush calibration see User Manual, Automatic Brush Calibration.
Comments
Let the brush spin for 5-8 minutes above ground level before taking the brush into operation. This is in order to remove possibly loosed treads.
Automatic Brush Calibration
The sweeper is in working position and the engine is running.
- Place the sweeper on a flat surface with similar surface as the runway. The machine is in “Drive” and parking brake is not activated.
- Lower the brush and plough, and press the button for brush adjustment menu.
 Figure 7: Brush adjustment menu
- Press the button for automatic brush calibration.
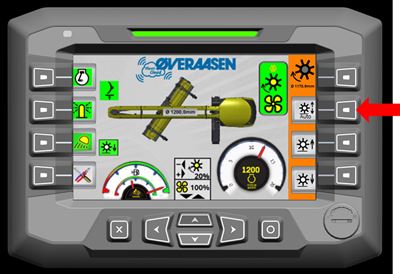 Figure 8: Automatic brush calibration
- Press O to confirm and the calibration starts.
 Figure 9: Calibration starting
- When the calibration starts, you will get a message to drive forward. Drive slowly forward about one meter to align the caster wheels in driving direction, and stop carefully (either by the plough or light braking).
 Figure 10: Calibration in progress
- When the calibration is done the brush will be lifted.


